Schedule Planner
Schedule Planner is a tool for students and advisors to use. The tool can easily create class schedule options in a couple of minutes. It allows students and advisors to compare multiple class schedule options side-by-side. Students are able to add breaks to avoid scheduling options to conflict with practice or work. Once satisfied with the schedule, the student can enroll in Schedule Planner.
How to Use Schedule Planner
Step 1: Log into Joe'SS and click on the Manage Classes tile. Select the Schedule Planner link from the left-side menu.
Step 2: Accept the Statement of Financial Responsibility. Once accepted, Schedule Planner should open up.
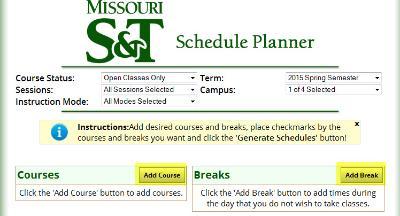
Step 3: Select Term, Campus, and Session.
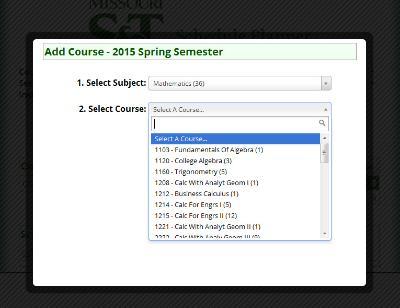
Step 4: Create your course list by clicking Add Course and selecting courses from the drop down. Add breaks to your schedule by selecting Add Break.
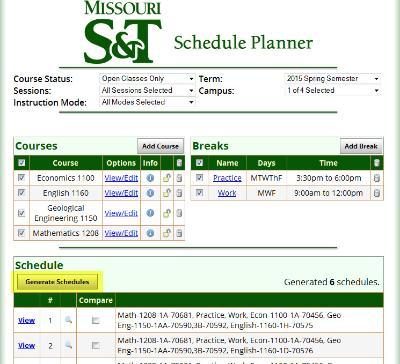
Step 5: Once all courses and breaks have been added, click Generate Schedules. To view optional schedules select View. You will be able to see the schedule as a list and in block format.
Step 6: Enroll in classes by clicking Enroll. Enter any permission numbers if needed.
Step 7: Once back in Joe'SS, you should be able to see your class schedule.
Helpful Hints
If you run into issues where no schedules are generated, you should try adjusting your course options and/or breaks. To do this, just uncheck the box next to an item on your Courses or Breaks list and select Generate Schedules. Also, you might want to change your Course Status at the top of the screen from Open Classes Only to Open & Full w/Waitlist Option.
To avoid certain sections of courses, select View/Edit next to the desired course in your Courses list and uncheck sections you aren't interested in. Once complete, select Generate Schedules to refresh your list.
Once you are enrolled in classes and are interested in adding an additional class, Schedule Planner will automatically pull your current schedule into the tool so this doesn't need to be entered again. If you are looking to swap a currently enrolled class with another one, uncheck the class in your Current Schedule and add the course you are looking for to the Courses list.
If you have any questions on how to use the tool, there are several good tutorial videos available by selecting Help Videos from the upper-right corner of the tool or you can contact the Registrar's Office.
Follow Office of the Registrar